Step 1: Scope the place
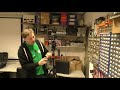
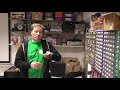
First thing you do when you want to put a rig in a space is look at the space. Where is the stage? Where are the power outlets? Where do we expect the speaker to be? Is there a mixer and if so, can we get an output from it? How will the attendees get in and out of the room? From where will the sunlight enter the room, if at all? Rooms come in all shapes and sizes. Rectangular with the stage at one of the narrow sides is the most common. You'd have the lectern to the left or right of a big screen or TV, hopefully somewhat elevated. People typically enter the room either from the side or from the rear. Alternatively, the stage could be along the wide side. It's common for the space to then have multiple projection screens, with the lectern in the middle. When you look at the room, what you're trying to work out is an answer to the question: Where in this room will I set up? In well prepared venues, a rarity I can assure you, the venue techs will have an assigned point for you to set up, where they already have a place in the room to which they feed all the signals we need. Far more common, you'll find yourself in a room with a projector and a wish of good luck. In this case you'll need to collect the laptop's image up front at the lectern, which provides your first fixed point from where you'll need to operate.Step 2: Where to place the camera and the PC
We know each rig comes with 3 segments of 10m SDI cable. From the PC we're going to have to run 1 cable to the lectern and 1 to the camera. We can combine 2 SDI cables to make a 20m one, but, unless you have another rig you can borrow cable from (I've succesfully combined over 7 segments with perfect signal), that's as far as it'll go. On top of this there's going to be an audio cable either running from the lectern to where the rig PC is, or from the mixer to where the PC is. If there's a mixer in the room, try your damndest to use it, but if you can't, know that the microphone provided with the rig is very decent. Our own microphone comes with a 10m cable, and there's a 10m XLR cable packed in the rig. XLR cables have a male and a female side, so if the venue have more you can extend them without worry and be more free to setup where you want to. Obviously there needs to be at least a little slack in every cable, and you'll want to prevent at all costs the attendees walking over these cables - it'll significantly diminish the cable's longevity, plus the attendees might trip. Some venues will have special mats or even some of those heavy-duty plastic conduits. These options are all fine, but best is to have your cables hug the wall and simply be out of the way. If there's an entry/exit other than an emergency exit that your cable needs to be run past, try to route your cable up, over this passageway. It'll mean you can't run your cable as far, but you'll be glad you did in the end. Before you do anything, simply lay the cable out in the room so you know you can reach the points you need to. Where you put the rig PC you're also going to need power. There ought to be an extension cord with the rig, but it'll possibly not be very long. Soon it'll become clear where the rig PC needs to be placed, and where the camera can be. If there's nothing there yet, ask the venue people to provide you with a small table in the spot you want the rig PC to be. At a push you can put the rig in/on a windowstill or even on the floor, allowing you to use the rig itself as a flat surface for the mouse or keyboard.Step 3: Build up the camera
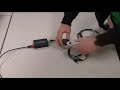
Take the tripod bag and the camera pouch from the toolbox, and go to where you want to setup the camera. Take out the tripod and place it, as extended as it can be. It'll take up a fair chunk of floorspace with its long stilts. Pull open the latches to release the legs and tighten them again once you've pulled out the legs. Screw loose the bolt on the side of the center shaft and pull the little lever out. You can rotate the lever to push up the head of the tripod, but I'm too impatient for that and just pull it out. Go as far as it'll go, then tighten the bolt again. Doesn't need to be tight, just fixed. You'll notice that the head of the tripod has a bit of a hole on top. This is where the quick-release plate connects. This quick-release plate is already attached to the camera, which is in the camera pouch. You'll notice that the quick-release plate is attached to the camera via a 90 degree angle bracket. This is by design, to allow us to film in portrait. It'll soon become obvious why this is. On one side of the head of the tripod there's a little lever and a button sticking out near where the lever rotates. Take out the camera and slide it into the hole on the head of the tripod at a slight angle. As you push it in, also gently push down. The quick-release plate will push against the button which, once pressed, will release the lever which will snap right and clamp down on the quick-release plate. If it doesn't do this, or you can't get the camera in the hole, the lever will have already snapped and you need to rotate it to the opposite side. Once the lever has snapped against the quick-release plate, push it fully against the quick-release plate so it'll be mostly flush against it. At this point, the camera will be fixed in position. Next, take the signal converter box from the camera pouch, and the short MicroHDMI-to-HDMI cable. Push the cable into the box, and press this as a whole to the post of the tripod, under the head. You want the box to be high against the post, but without you putting tension on the HDMI cable because the head sticks out so far. Once you know roughly where the box needs to be on the post, place it on any flat surface, grab a 15cm strip of tape and attach the center of it to the large side of the converter box. Nicely wrap it around (only!) the long, narrow sides and now press the box against the post of the tripod, under the head, where you previously held it. Wrap one side of the tape around the post fully. Next, wrap the other side around the post and over the previous section. If the strip is long enough, fold the outer edge back onto itself so you have a point from where you can easily grab the tape to pull it off again. Connect the MicroHDMI side of the cable to the camera. You'll need to open the flap of the camera and this might cause the camera to turn one, assuming its battery hasn't died, which isn't uncommon. Next, we take the power box from the camera pouch. It'll have a 1-to-4 cables side with barrel connections, and a single cable side with a GX12-2 connector. Of the barrel connections, one should have a short extension cord attached to it that ends in a somewhat narrower barrel connection. This connection goes into the camera, at the lower rear. Any one of the other barrel connectors goes into the converter box, usually next to the BNC connector. Finally, we rip off a small section of tape and use it to stick the power box to the converter box by the cable. Never, under any circumstances, block the openings of the power box - it very much needs those to vent out the heat generated within.
With this done, connect the SDI cable to the HDMI-to-SDI converter and the power box to the GX12-2 connector. Be careful to put the correct side of the cable to the front as the GX12-2 connectors are gendered and you might need to lay it in opposite direction, so don't tape down or tuck away the cable until you know it'll attach. There's a notch on the inside of the connector so it only goes in one way, and should do so smoothly. Don't force anything. Once you've connected the GX12-2 connectors and the SDI connector, you're done. We will later attach the other side of the cable to the rig PC.
Step 4: Build up the lectern
Starting in 2020, I've bought new bits that should make the attaching of speaker laptops significantly more reliable. From the toiletries bag in the toolbox, grab the large-ish HDMI-to-2-SDI box with the 2 BNC connectors as well as the red HDMI cable. This is where the laptop will be connecting to, so insert the HDMI cable and place the HDMI-to-2-SDI box on, in, under or near the lectern, preferably out of sight from the camera and the audience. Make sure that the HDMI cable can reach as much of the space assigned to place the speaker laptop. Next, take the power box from the toiletries bag, and attach it to the HDMI-to-2-SDI converter. Now, take the very short SDI cable from the toiletries bag, as well as the SDI-to-HDMI converter box. Yes, it looks just like the box used on the camera, however this one operates in opposite direction - it converts an SDI signal back to HDMI. Use the short SDI cable to connect the 2 converter boxes, and connect the SDI-to-HDMI converter box to the power box. Plug the venue's HDMI cable that feeds into the projector onto the HDMI port of the SDI-to-HDMI converter box, or use the white HDMI-to-VGA dongle if the venue still uses VGA. Finally, connect our long SDI cable to the remaining BNC connector on the HDMI-to-2-SDI. There's no order, both provide the exact same signal. Connect the power box to the GX12-2 connector on our long SDI cable, and we're done. Take the various dongles and the clicker from the lid of the toiletries bag and lay them out on the lectern for the speaker to use as they see fit. Test that the clicker is on by pressing the large center button and seeing the laser pointer turn on. If it doesn't, make sure the on-off switch on its side is in the 'on' position. If that is the case the battery is probably dead. It's a standard AAA battery. Ask if anybody has a spare or can go out to buy some. Place the clicker back in the toiletries bag until you have the battery - no need to get the speakers' hopes up if we can't deliver.
Step 5: Build up the rig PC
We now have 2 long SDI cables, possibly extended, going to where we want to put the rig PC. Hopefully we by now have a little table to place the PC on, and there are power sockets nearby for the machine. If the rig comes with a full-sized monitor screen, you'll need 2, otherwise you'll need 1. Grab the base plate from the tool box and the monitor leg from the top-left corner of the toolbox. They click together, and you can then slide that into the monitor screen. Place it on the table, connect it to a plugged in kettle lead for power and hit the on-off button if you need to to turn it on (some will turn on automatically at the first sign of electricity). Connect the HDMI cable to the monitor and plug it into the rig PC, which you've now placed on the table as well. Grab the flexible keyboard and the tiny mouse from the lower-right corner of the toolbox. Extend its cable (gently! They can break) and insert the USB plug int he PC, same as the keyboard. Plug the second kettle lead into the PC and turn it on. You may need to flick the on-off switch on the power supply. Just let it boot - it'll take a minute or so. In the mean time, connect the 2 SDI cables to the rig - the one leading to the camera in the SDI card nearest the power supply, and attach the GX12-2 connector to the ports on the PC. When you connect the power, keep an eye on the power box and the bits at the other end. As soon as you connect the cable, LEDs should turn on, first and foremost within the power box itself. Power boxes can die, so once you connect a cable, go to the other end and make sure everything seems happy. There is a spare power box in each toiletries bag should it be needed. Now that everything has power, take the transparent blue USB cable from the toiletries bag, as well as the external sound card. This is either a big Roland Duo-Capture EX or a Shure X2u. The Shure is the size and shape of a thick cigar. If you have a rig with a Roland, there will be a cable in the toiletries bag that has 2 3-pin XLR sockets on one side, and 1 XLR socket on the other. Attach the 2 to the sound card. The single remaining connector is what will connect to either the mixer or the microphone. The Shure only has the 1 XLR connector on its end. Use the USB cable to connect the sound card to the PC. You can tell from LEDs on the face of the sound cards that the device is now on. The Roland has an on-off switch on the back that you may need to press. If we're going to use our own microphone, we will need to provide power to it. XLR has a concept called Phantom Power for just that. There's a toggle on the back of the Roland, and a little button on the face of the Shure to enable it. The Shure has an orange LED to indicate it's on, with the Roland you can simply tell from the position of the toggle on the back - it's clearly labelled. If you're NOT using our own microphone, make sure that Phantom Power is turned off. Some mixers react rather poorly when you provide Phandom Power to them, and as they're without exception connected to a power lead they certainly won't need it. If we're using the microphone provided with the rig, you can find it in the front pouch of the toiletries bag. Place the microphone as near as you can to the speaker. The goal is that they talk over it, so make sure it is between the speaker and the audience at all times. Feel free to get creative. I've often resorted to taping the microphone to the ceiling. Be on the lookout of sources of noise though, like air vents. You should instruct the operator of the rig to remind the speaker that they should stay behind the microphone. They likely won't, and it'll make the audio clarity a bit less, but at least they were told. If there's a mixer in the room, leave the microphone in the toiletries bag and instead grab the 10m XLR cable from the toolbox. It has a Jack plug connected to one end, which is what you should provide to the sound tech - they can decide if they need to use it or not. If they don't, they should detach it and give it back to you. Just put it back in the toolbox. Connect the other end of the XLRcable to the single XLR input of the sound card. The PC should now be booted up and everything seems to be in place. Time to test.Step 6: Configuring the rig PC
A small set of configuration files should have been made for the day. The process for that is described in the Shutting the recording down step, and you should have these config files now on some USB stick. Using the mouse, right-click on the desktop and select "XTerm" from the menu that appears. A terminal window will appear. Insert the USB stick and mount the drive via the command mount /mnt - you should not need special rights to do this. Copy the configuration files over to the current directory, or more likely, unpack the tar.gz or tgz file from the stick using the command tar xvf /mnt/path/to/the/file.tgz which will create a directory structure. With single-track, single-day conferences this may simply be a folder with the name of the event, whereas multi-day, multi-track events will have below the folder named after the event subdirectories that indicate for which track and which day those configuration files are. You can enable a configuration with the command set_event.sh path/to/folder so say this was track 2 of BSides Leeds, a single-day, 3-track event. The unpacking will have created a bsidesleeds folder under which you will find track1, track2 and track3 as subfolders. Configure this rig for track 2 by running set_event.sh bsidesleeds/track2 - this will create a symbolic link in your home directory called event, pointing at the named folder.Step 7: Testing
Right-click on the desktop, open the Recording menu on the top and select from this menu start. A number of terminal windows will appear. Some may disappear as the system starts everything for the recording process. If everything started correctly, you will have 4 XTerm terminal windows along the top-right of the screen, 2 of them to the lower-left, a window with the schedule in the top-left and OBS in the lower-right. If any of these are missing, shut down the recording as per the later step, and start it again. If it again doesn't end with all the windows shown, contact Cooper because something is amiss. In the OBS window, in the bottom-left, select either PiP Presentation Right or PiP Presentation Left. This stands for Picture In Picture with the Presentation to the Right/Left of the speaker - it's to indicate where in the room the projection screen is relative to the speaker, and will make OBS swap the layout to accomodate this. Select the correct one and on the screen you should see the image of the camera to the side and probably nothing in the big space next to it. Grab a laptop or anything that can create an image over HDMI and connect it to the red cable on the lectern. Make sure you can see the image the laptop is sending, and that this image is also shown by the projector. Next the audio. If we're using our own microphone it should already be on. In the center-bottom of OBS you'll see 2 volume indicators - one named Roland and one named Shure. If you clap your hands you should see the volume indicator react. If you don't see anything, make sure the cable is properly connected, that the sound card is turned on, that Phantom Power is on and that the volume dial (the 'gain' and 'volume' wheels on the Shure) is sufficiently open. When we plug into a mixer, ask the audio tech to test the sound. They'll grab a microphone, open the channel and start sending. Tell them if you see it come in. The Roland has a small red LED on the front that lights up when its input is too loud. The Shure has an LED at the side of the XLR connector that first turns green, then orange, then red when the input is too loud. In both cases, red is BAD. Lower the gain/volume until you can see within OBS that normal speaking voice (well, normal addressing the crowd voice) pegs the V/U meter at about 70% of max. So long as you're not live-streaming, it's safer to err on the low side because if you go over and the red light goes on, your audio is getting deformed. We can make a quiet sound very loud indeed, but we can never make a deformed too loud voice sound normal again. What you're also looking for is that you can clearly tell from the V/U meter in OBS the difference between someone speaking versus it being quiet. Even when it's quiet the V/U meter will almost always show some noise. You can connect a headphone to the Jack port on the front of the Roland or to the mini-jack on the side of the Shure to listen in to the audio. I would highly recommend you try to do this, especially when there's a fancy mixer in the room. You may be on a completely separate channel of the mixer that gets its own, unique mix which may involve music, some noisy input they forgot to turn off or crackling noise because they overdrive an input. NEVER assume what you're getting is, in fact, the exact same sound as what's being sent into the room.You're now ready to start recording. If this was all done to set up for a recording the following day, shut down the recording, turn off the camera by pulling out the mini-HDMI cable and closing the lid on the camera, and disconnect the power box for both the camera and the lectern-side of things. This isn't vital, but I believe it's best. I never turn off the PC itself though. If you shut down the recording and turned off the camera overnight, the next day you will need to redo the focussing of the camera. It may look proper on the screen, but it'll be off and you won't see it until you see it on a bigger screen.
Step 8: Focussing the camera
Every time you turn on the camera, you must re-focus the camera. The video in step 3 shows the process for this starting from 6:10. Zoom in to something near where the speaker will be standing. Best is when this something has text or detail or something that makes it easy to see if that something is in focus or not. On the camera's (touch)screen, click the MNL icon and from the menu that appears, select iA+. The camera will adjust the focus, brightness, etc to something that should be spot-on. Next, press the iA+ icon on the screen and switch it back to MNL. From the menu that appears, select FOCUS, and then choose MF for Manual Focus. The menu will now disappear. Zoom out to the point where one would expect to be able to see the speaker. Press the 2-arrows button in the top-left to see the menu once again, then press the IRIS button. You will see the brightness setting. Adjust it to taste.Shutting the recording down
It's common that when you start up the recording, not all terminal windows stay around. This is a timing problem between the bits that take the video in and distribute it versus the bits that expect to receive a feed. I'll hopefully soon have updates for my startup scripts, but in the mean time you may need to shut the recording down manually and then restart it again.To shut down the recording process, start with OBS. Make sure it's not recording and not streaming anymore. Either click the exit button or the icon in the top-right of the window to close the program. Next, in the terminal windows along the top-right of the screen, press the letter 'q' once in each of them. They'll shut down quickly, although the rightmost one, which deals with the audio, is traditionally a bit slow in that regard. The two terminal windows in the lower-left should be stopped similarly, except the scripts running here will auto-restart the process - a safety measure. Press 'q' and then, within the next 3 seconds, press CTRL-C. You can also press CTRL-C twice - it has the same effect. Lastly there's the schedule in the top-left. Click the X icon in the top-right of the window to terminate this program.
Rolling up the cables
All my cables (should) have colored notches The best way to roll up a cable into a bundle is using a technique called Over-Under. It prevents your cable from turning into a coil. The idea is that if you 'normally' loop a cable, you twist the cable a little with every loop in the same direction and eventually this twist will end up being fixed within the cable which makes it difficult to handle, and it can result in the breaking of the cable. To remedy this situation, we alternate the loops, twisting in one direction for all the odd loops and in the opposite direction for all the even loops. You achieve the twist in the opposite direction by running the wire under the loop you make instead of next to it. If this description puzzles you, look at the video above, I'm sure it'll clarify things immensely.